Legacy Home Improvement Property Pros banner

This is a sponsored column by Jim Muldoon, a Northern Virginia native, Arlington resident and one of the real estate and remodeling experts at Legacy Home Improvement Consultants. Legacy HIC is your source for all real estate and home improvement needs. Please email with any questions or topics you would like covered.

Remodeling your kitchen and bathrooms are the best value adding jobs you can do to your home. If your budget doesn’t allow for full remodels, or your whole home needs to be spruced up, here is a checklist for some of the most important improvements you should make prior to listing your home for sale.

Paint — This is at the top of the list. New paint will freshen up your home and make every room look crisp. You might be able to get away with just walls and trim, but check your ceilings for water stains or bad paint lines to decide if they need to be added. Average cost is $5,000-$7,000.

Flooring — Replacing carpet and re-finishing hardwoods are a cost-effective way to refurbish the area that gets the most wear in your home. $5-$10 a square foot is what you can expect depending on carpet or hardwood.

Lighting — You want your house to be well lit. Buying new light fixtures and ceiling fans not only give you better light, but also add a stylish finish to your home. $50-$150 for installation per fixture.

Kitchen Appliances — Brand-new kitchen appliances are an easy way to update a kitchen’s look, as well as providing peace of mind to buyers. I recommend stainless steal or black. Standard packages range from $1,500 to $3,500.

Bathroom Shower and Tub Surrounds — Re-caulk all corners and touchup grout so these areas are clean and waterproofed. $25-$75 depending on the size of the shower.

Professional Cleaning — Good cleaning services have the equipment and methods to get your house show ready. Make sure they include wiping down walls, blinds and windows in their deep clean package. The average cost of a one time deep clean is $350-$500.

Entrance to Home — Painting or replacing the front door and making sure the walking path up to the house is in good repair makes for a great first impression. Tighten up handrails, fix stairs and make sure the seals around the door are in good shape. Replacing a front door on average is $7,500. Just painting and doing minor repairs should be in the $500-$1,000 range.

Landscaping — Trim bushes, mulch, plant some flowers, cut the grass and edge. A $500-$1000 budget should give the average yard good curb appeal.

Email me at [email protected] with any questions or topics you would like me to discuss. Be sure to follow us on Instagram @LegacyHomesDMV and like our Facebook page Legacy Home Improvements for project inspiration and breaking news.


Legacy Home Improvement Property Pros banner

This is a sponsored column by Jim Muldoon, a Northern Virginia native, Arlington resident and one of the real estate and remodeling experts at Legacy Home Improvement Consultants. Legacy HIC is your source for all real estate and home improvement needs. Please email with any questions or topics you would like covered.

With the weather going from hot to cold, there are a lot of good ways to prep for protecting your home and minimizing energy expenses. Here are some tips to get your property winterized.

Make sure you keep the cold out and the heat in. Check the seals on windows, doors, piping coming into the home, electric lines coming into the home, exterior exhaust grills and attic fan venting to stop unwanted air flow. Foundation cracking and weather strips on garage doors require more than just caulking, but a quick sweep of the exterior should identify those issues.

Exterior maintenance is important before it gets too cold. Check for cracks in your driveway, walkways and brick. Handrails need to be secured so when ice is on the ground, you can rely on that support. A roofing professional should make sure there are no leaks in the roof and that the gutters have been cleared out. Trim back tree branches that are close to your home and walkways, so they will not be at risk to break with the weight of snow. Disconnect hoses and shut off valves that run to exterior water-spouts.

Winter to HVAC professionals is like tax season to accountants, so get your equipment serviced now before it is too late! Check filters to make sure air flow is not impeded. Have your fireplace cleaned and inspected for regular use. Re-program your thermostat schedule so you stay comfortable without major ups and downs for your interior heat. Change the direction of your ceiling fans to create an upward draft to redistribute warm air. Prepare for power outages by stocking up on firewood and replacing batteries in flashlights, smoke detectors and carbon monoxide detectors.

Re-organizing your mud and utility rooms is very helpful. Having the right equipment in place for snowy months is better done while it’s still warm out. Take out your snow blower and make sure it is in working order. Bring your shovels, ice melt and snow boots to accessible areas. When putting away your lawn movers and other gas powered lawn equipment, drain out left over gas in the tank.

Checking these items off your list will give you head start on enjoying your holiday season.

Email me at [email protected] if there are any topics you would like me to cover in future articles or you have any questions about a remodeling project you are about to undertake. Your real estate is one of your best assets. Let the Property Pros help you get more informed.


Legacy Home Improvement Property Pros banner

This is a sponsored column by Jim Muldoon, a Northern Virginia native, Arlington resident and one of the real estate and remodeling experts at Legacy Home Improvement Consultants. Legacy HIC is your source for all real estate and home improvement needs. Please email with any questions or topics you would like covered.

One of the most common reasons for a bathroom remodel is converting a tub-shower combo to a walk-in shower. This small area has a lot of moving parts and requires a lot of decision making for the homeowner. Here is a guideline to simplify the process.

The standard dimensions for a tub-shower combo are 60 inches in length, 32 inches in width and 8 feet in height.

The Basics

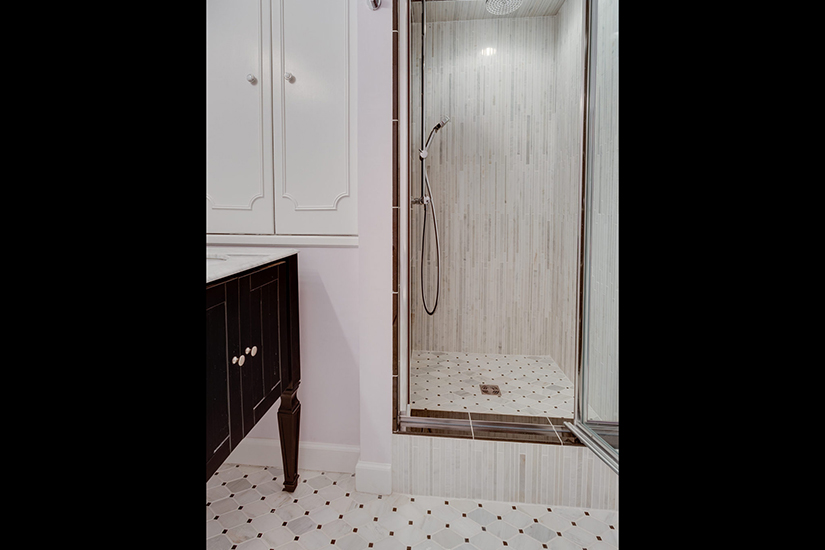
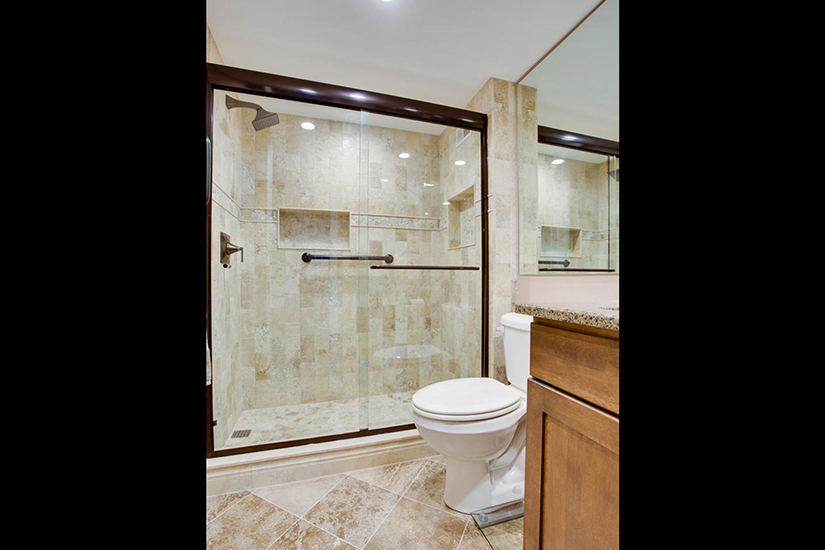
Tile — Your tile selection has the biggest influence on the look of the shower. You will need 90-95 square feet of wall tile and 15-20 square feet of shower floor tile. Typically to finish off the edges, a bullnose tile or a Schluter strip is used. To account for the height of the wall tile, 20 linear feet will work.

Plumbing — For a center drain location, a 4 inch circular or square drain works. If you would like the drain in the front of the shower, I would recommend a 28 inch wide linear drain. I always recommend swapping out the diverter valve during a bathroom remodel. The rough plumbing stage is also the time to determine your shower head height. Switching to a rain shower head is becoming more common and could require raising the height of the water supply.

Shower Door — Frameless shower doors are the craze but check and make sure there is enough space for the clearance of a swinging door. If not, Semi-Frameless sliding doors are a great option that are affordable and still show off the tile work behind them.

leachbeforeandafter1-1024

The Upgrades

Niche — This is a recessed shelf in the wall of the shower. They have become a staple in new showers. Check out the height of your bathroom products to help figure out the dimensions you want them built out to. The added materials required will be 8 bullnose tiles to finish off the edges.

S Rolfe StStep or Seat — Shower seats are very popular but take up a lot of space in a tub to shower conversion. We build a lot more steps for this type of remodel. They look like a seat but smaller and are located in the corner of the shower. Bullnose will be required to finish off the edge as well.

Wall Accent — Installing a decoration strip around the shower walls adds a lot of pop. You can run mosaic tile flush to the tile or add pencil edging to each side to frame it in.

Grab Bars — This remodel is very common for adults wanting to age in place. Framing is required for grab bars, so let your contractor know about these items before the backer board is put in place.

Recess Light — There are recess lights made for the shower area. We like to run a separate switch so that you don’t have to waste energy when you are not in the shower.

Finishing Touches

sc4-1024Ledges — A fabricated piece of stone gives a nice high-end finish to the bottom of niches, the top of the shower curb and the top of the step.

Grout — Getting flexible grout admixture helps reduce grout cracking and maintain its proper color. If grout discoloration has been a problem in the past I would use power grout.

Silicon Caulk — You can match your grout color for the tile areas that require caulking . Clear silicon should be used around the fixtures.

Email me at [email protected] with any questions or topics you would like me to discuss. Be sure to follow us on Instagram @LegacyHomesDMV and like our Facebook page Legacy Home Improvements for project inspiration and breaking news.


Legacy Home Improvement Property Pros banner

This is a sponsored column by Jim Muldoon, a Northern Virginia native, Arlington resident and one of the real estate and remodeling experts at Legacy Home Improvement Consultants. Legacy HIC is your source for all real estate and home improvement needs. Please email with any questions or topics you would like covered.

Right before most construction projects begin there is the excitement about the project, but also the anxiety of living through it. The end product is always very important, but equally important is my client’s experience during this process. Living through construction does not have to be uncomfortable. Here are some tips to improve your experience.

Start with your schedule. Figure out what time construction can start without disrupting your morning routine. At the end of the day, you want to be able to wind down. Always factor in clean up and organizing construction material into the time you want everything done in your home. I recommend using an electronic lockbox to give your contractor accessibility to a key on the door you want them using. Most will let you program the days and times that your keys can be accessed. You can also make different pins for different people so you can track on the digital log who has accessed the lockbox and at what time. Giving accessibility to your contractor will go a long way towards keeping your regular schedule and not being handcuffed to the project.

Designate areas for construction use. Let your contractor know where he can park. In your home, find the most direct path from the construction site to an area outside that can be used for cutting, sawing, and storing construction material. Carports and garages are the most common areas. Some materials, like hardwood, require a certain amount of time being at room temperature before they can be installed so an area in the home might be necessary. Along that path, designate a bathroom to use. Remove all the personal items you can from these areas so they don’t get damaged. Designating areas for you and your family is helpful as well. Checking on progress is important, but the more you go through the construction areas the more chance dust will appear.

Discuss with your contractor his plans for controlling the construction zones. Plastic zip walls are great for keeping dust and debris in. They tend to limit foot traffic as well. I like to use extra air filters on the hvac returns and change them frequently. Use carpet protection adhesive for your carpeted areas and ram board on hard floor surfaces that run to and from the designated construction areas. I like to schedule professional cleaners throughout the process. Everyday the site should be cleaned and organized, but no matter how clean a company is some dust escaping is inevitable.

Setting up ways to stay in the loop that works for you and your contractor should be established as well. We like to use web based platforms like Co-Construct, but setting up a Google Drive is free and effective. Having a central location where updates, progress, and questions can all be addressed will take a ton of stress off your shoulders.

These are the basics that have really worked well for my clients. If you have more specific questions about setting up your home for construction email me at [email protected].


Legacy Home Improvement Property Pros banner

This is a sponsored column by Jim Muldoon, a Northern Virginia native, Arlington resident and one of the real estate and remodeling experts at Legacy Home Improvement Consultants. Legacy HIC is your source for all real estate and home improvement needs. Please email with any questions or topics you would like covered.

Pulling permits is an important part of remodeling. A lot of clients tend to shy away from them with smaller projects because they add time and cost. I am here to get you informed, so the process doesn’t seem as complicated. Permitting is a little bit different in every county, so let me give you a quick rundown of what to expect in Arlington.

For smaller interior renovations, the square footage of the area affected and the trades being used will determine the price of the permit. Once an interior renovation removes or adds walls, the building permits will require drawn plans.  For exterior projects like decks, additions, and roof replacements, the county will want three sets of drawings as well as the plat of the home. Depending on the scope of work, a site and grading plan and a stamped engineer plan might be necessary. If that is the case, the review process can take a couple of weeks depending on how busy the county office is.

A homeowner can pull any permit. That option can be helpful when you have paid for a set of plans and you want them going to review while your contractor is pricing out the project. I would submit them under “contractor to be determined” and then add their license once you have come to an agreement. On smaller projects, it is also a way to keep cost down.

However, I always recommend using your contractor to pull the permits and here is why. First, it will vet that your contractor is licensed to handle the size of your project. Next, walking in a permit takes time and if the reviewer has any questions they will contact your contractor directly. The fee for your contractor to pull the permit should also include scheduling the inspections, meeting the inspectors, and closing out the permit. Sounds easy enough, but county inspectors schedule in 2-3 hour windows which start to really add up when there are multiple inspection check points.

Those check points are a great mark to tie your payment plan to because once an inspector signs off on the work, you also can. Another advantage for having your contractor running the permit process is if there is a minor adjustment needed to spec a permit to close, your contractor is there and can possible rectify the issue without having to reschedule an inspection.

Once a permit is closed, it is an official record that verifies the type of improvement you made to the home, the professional grade of the contractor you hired, and that the remodel was constructed up to the standards of the county building codes. Always ask to get a copy of the “final” once the permit has been closed. The county does keep records, but you should have them on file as well. This is extremely valuable for re-sale purposes, as well as your own peace of mind.

If you have specific questions about a remodel you are considering, give me a call at 703-953-9387 or call the County Inspectors office directly at 703-228-3800. Please email me at [email protected] with any questions or topics you would like me to discuss in the future. Be sure to follow us on Instagram @LegacyHomesDMV and like our Facebook page Legacy Home Improvements for project inspiration and breaking news.


This is a sponsored column by Jim Muldoon, a Northern Virginia native, Arlington resident and one of the real estate and remodeling experts at Legacy Home Improvement Consultants. Legacy HIC is your source for all real estate and home improvement needs. Please email with any questions or topics you would like covered.

Updating your condo you can improve your quality of life, make your condo stand out, and maximize your living space. Renovation tends to get overlooked by owners because the process takes more planning, but trust me it will not get overlooked by your resale value.

I always recommend starting off with contractor selection. Hiring a professional who has experience with condo renovations is important. Your property management, building engineer, and /or neighbors could be a good resource for referrals. 

Next, schedule a meeting with your property management and your contractor. There your contractor will provide his credentials and the plans for the project. Projects that involve structural change or adding a washer and dryer usually have to get approved by the board but most renovations can get approved right then. After the project gets approval, your contractor needs to get the following information:

  • Contractor parking, access to the building, and the commercial elevator
  • How much notice is needed for the start of the project and plumbing shut off
  • Moving and other renovation schedules so the loading docks and commercial elevators are available
  • Days and hours work can be conducted
  • Contact information for the building engineer and contractors who have completed projects in the building before

Have a meeting in your condo with your building engineer and contractor. The engineer will be able to give you a lot of insight on what is going on behind the walls. This will eliminate change orders and vet that the vision you have for the final product is what you are going to get. They also usually have great tips for things they have seen in the past that help maximize space or how to get past hurdles with simple fixes.

A lot of my clients have said they get nervous that they will be disrupting their neighbors. Give your neighbors a heads up and you will be pleasantly surprised about how many of them will be supportive. Past clients have even gotten tips from neighbors about unexpected things that they uncovered during their own renovations and local amenities that can you can utilize while living space is lost during the renovation. One of the things we do to alleviate issues is talk with the neighbors who are in ear shot. We let them know the project timeframe, our efforts for keeping the common grounds clean, as well as our contact information if they need to get in touch with us. That face to face interaction about the project goes a long way.

Email me at [email protected] with any questions or topics you would like me to discuss. Be sure to follow us on Instagram @LegacyHomesDMV and like our Facebook page Legacy Home Improvements for project inspiration and breaking news.


Legacy Home Improvement Property Pros banner

This is a sponsored column by Jim Muldoon, a Northern Virginia native, Arlington resident and one of the real estate and remodeling experts at Legacy Home Improvement Consultants. Legacy HIC is your source for all real estate and home improvement needs. Please email with any questions or topics you would like covered.

Original 8.10.15 (8)Cabinetry was the part of the kitchen that the majority of readers voted for in last week’s poll. I was able to get an interview with the renowned Erin Foster, the owner of Foster & Company Design. She is known for her expertise with design and understanding of the construction phase, as well as supplying some of the top cabinetry lines in the area.

What are the first steps to ordering cabinets?

The first step is to address what you like and what you don’t like.  I recommend starting on Houzz and Pinterest, and looking at kitchens and saving photos of what you love.  A pattern will start to emerge, and you can share those photos with your designer as a tool to help communicate what you are looking for.

The 2nd step is to identify your budget and scope of work.  Don’t be afraid to share your budget. It is crucial to provide this information to your designer and contractor so they can help you prioritize your wish list accordingly. This keeps you from spending valuable time on options that are not appropriate for your home value or total budget.  The scope of work is equally important.  Are you looking for new cabinets and countertops only, or do you also need to set aside a portion of the budget for new appliances, tile backsplash, light fixtures, and floors too?  Thinking this through ahead of time is imperative.   

Once the budget and scope of work are determined it is time to meet with your designer. These first three steps have proven to streamline the entire process.

Are there certain features that are a must have?

Everything is on the negotiable list, depending on your budget and the size of your kitchen. But, some safe bets are soft close doors and drawers, because the price difference now is so small, that is definitely worth it.  More often than not, it is standard on most cabinetry lines. Always pick wood dovetail drawers over glued and stapled drawers. The glued and stapled drawers fall apart over time.  Also, think about where your trash will go. I always recommend a double pullout wastebasket. 

What is a reasonable amount of time from the start of your cabinet search to when they are delivered?  

Four months is reasonable.  But the more time, the better. You should expect a minimum of 2 months for planning, design, drawings, revisions, and selections.  The design and selection process takes time, not just for your designer, but you also have to think about your own schedule.  A homeowner needs to be available to go see different products and options that are available. The most successful projects require all selections be made in advance of placing the cabinetry order. Appliances, sink, countertops, under-cabinet lighting, faucets, floors, door and window locations can all impact the cabinetry sizes.  Then you need to account for the manufacturing of the cabinetry and the delivery time frame, which is typically 4-6 weeks for semi custom cabinetry, and 8-12 weeks for custom cabinetry.  

What is the most popular color scheme?

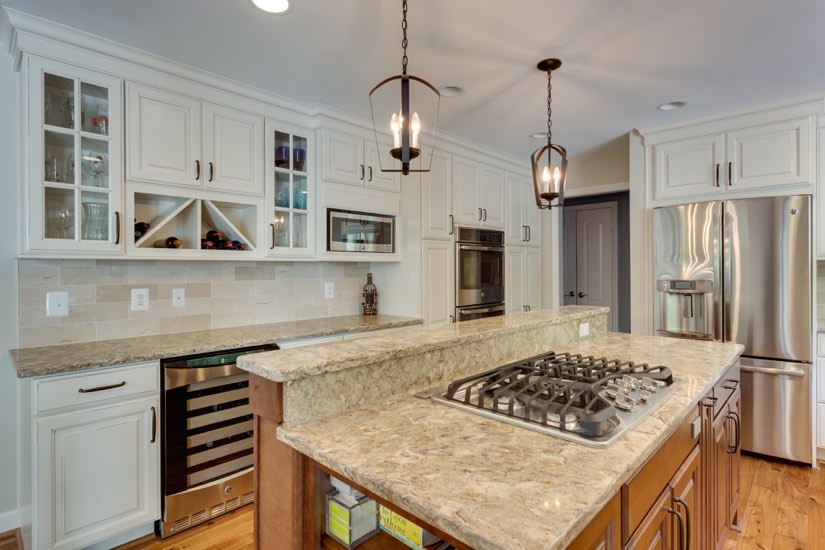
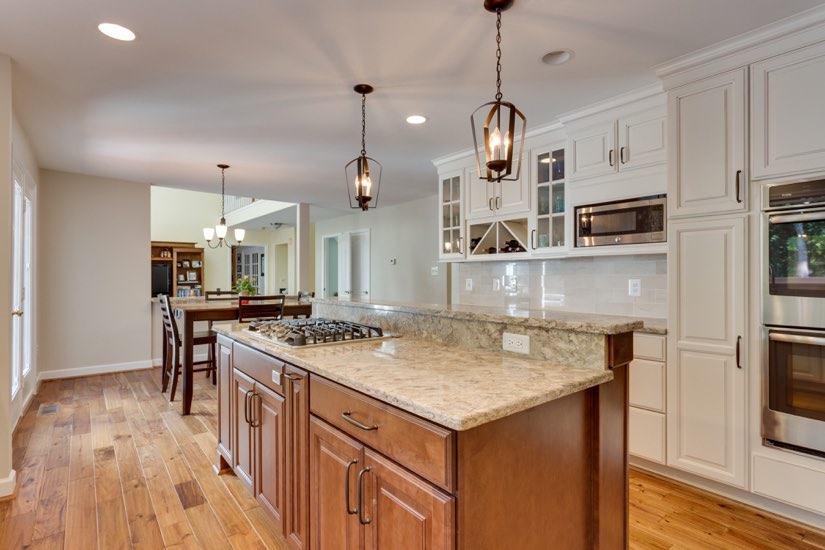
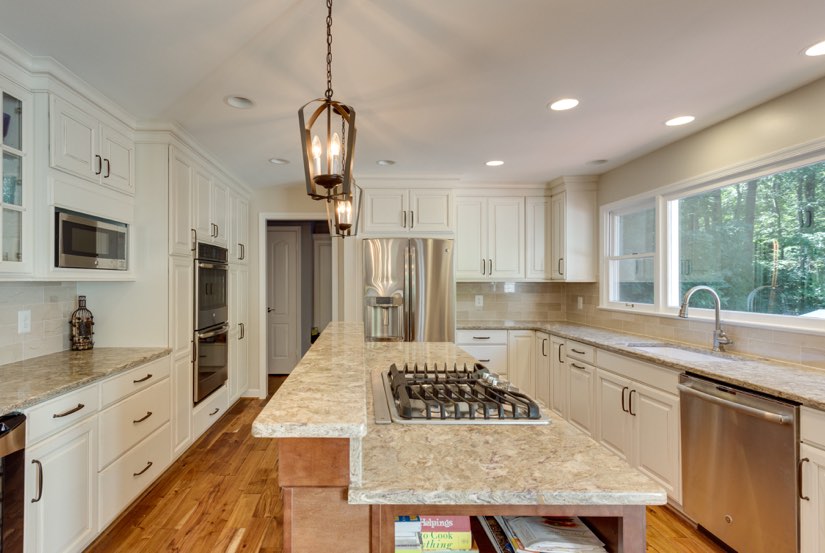
In our area, white cabinetry and light countertops are still the most popular choices today.  Accents of warm grey and soft grey tones are very popular.   

What are some costs associated with purchasing cabinets that most people would not think of?

Many designs on Houzz and Pinterest are showing high-end hardware that give these kitchens the custom look that is highly desirable.  But high-end hardware adds hundreds to even thousands of dollars to the total price. These same kitchens often feature custom wood hoods, high-end sinks and faucets, built in appliances and designer light fixtures and backsplashes.  Remember to discuss these items and price points with your designer.

What are the advantages to buying new cabinets instead of re-facing old ones?

Refacing can be almost as expensive as replacing cabinetry.  Refacing is a good choice if the cabinet boxes, drawers, and glides are still in great condition, if the countertop is already updated, and the layout of the kitchen is exactly what you want to keep.  Replacement is usually the right choice if you want to update your countertops, change your layout, or improve the quality and longevity of the interiors of the cabinets.   

Email me at [email protected] with any questions or topics you would like me to discuss. Be sure to follow us on Instagram @LegacyHomesDMV and like our Facebook page Legacy Home Improvements for project inspiration and breaking news.


This is a sponsored column by Jim Muldoon, a Northern Virginia native, Arlington resident and one of the real estate and remodeling experts at Legacy Home Improvement Consultants. Legacy HIC is your source for all real estate and home improvement needs. Please email with any questions or topics you would like covered.

Upgrading your countertops adds instant appeal whether you are doing a full remodel or not. Two great options are engineered or natural stone. Here is a quick run down when choosing stone countertops.

Engineered stone has gained a lot of steam in the countertop industry. The material is largely made up of natural quartz mixed with resins used for bonding. This makes the material stronger, lighter, and slightly more flexible than its all-natural counterpart. The material is not absorbent, so it has less maintenance and is considered more sanitary. Quartz products use specific dying patterns ensuring a consistent look, even when choosing an option with “natural movement” to it. Cambria and Silestone are two of the most popular brands of engineered stone.

Natural stone has proven to be timeless with a rich and unique look. Granite and marble have unique natural movements in their patterns, which allows you to find an incredible looking slab that no one else will have. It is a more porous material so sealants are necessary and recommended yearly. Granite has become the more popular option between the two because it is more durable and usually less expensive. Although on paper marble is hard to justify, it has a look that is second to none.

Granites are usually grouped A – E. Group A being the least expensive and Group E being the most. Quartz are priced by color. Once you have chosen the material the process for installation is very similar. I recommend a company that will digitally measure on site. Cabinets have to be set in place for this to happen. Confirm with your contractor or vendor the sink, faucet, faucet placement, and seam placement. From there it usually takes 7 days to fabricate and 1 day to install.

There are some fees to factor in when deciding on a square foot budget. There is usually a fee for templating the tops, sink cutout, holes for the faucet, delivery, and installation. This ranges from company to company but $400-$600 should have you covered. The cost of the sink, faucet, garbage disposal, and the plumbing connection also needs to be accounted for. You should be safe factoring in $500-$800. Upgrade options to consider are custom edge details, backsplash, waterfall options, built up edge for a thicker look, and extended over hang which is usually in bar areas. I recommend working with your contractor, even if you are just swapping out countertops, so that they can make sure all the factors have been taken care of.

Feel free to email me at [email protected] if you have any questions or would like to know which vendors we use for each specific type of countertop material. Be sure to follow us on Instagram @LegacyHomesDMV and like our Facebook page Legacy Home Improvements for project inspiration and breaking news.

Legacy Home Improvement banner

This is a sponsored column by Jim Muldoon, a Northern Virginia native, Arlington resident and one of the real estate and remodeling experts at Legacy Home Improvement Consultants. Legacy HIC is your source for all real estate and home improvement needs. Please email with any questions or topics you would like covered.

Based upon the last poll results, contractor selection is the most challenging part when you are getting ready for a remodel. One of the most important and overlooked aspects of this is creating a good rapport with the companies bidding on your project.

I have experienced a lot of guarded first-time clients which makes turning their vision into a realty extremely difficult. When a new potential client schedules an estimate, I plan for a 5-10 minute introduction so we can get to know each other before heading straight to the project area. It is proven that teams who mesh well together with trust, harmony, and a clear understanding of their common goal have a much higher success rate. Having construction done where you are living is not easy so taking the time to establish that relationship goes a long way.

As a client, you want to know if your contractor can construct what you want, within your budget, in a timely manner, and provide a certain level of customer service. While you are vetting those things, your contractor is also trying to figure out the exact same thing. Instead of two sides holding their cards close to their chests worried that the other one is going to take advantage of them, it makes a lot more sense to be on the same side working together to accomplish a great remodel.

You should start the conversation by talking about the job at hand. This will give you insight on whether this type of project is what the company makes their living off of or if it is not in their normal wheelhouse. Discussing your past experiences and theirs will be the first indicator if it’s a good fit. Next, I would talk about the process the company has after the estimate phase and how they protect your home and quality of life during the remodel. This aspect is very important, so if the company down plays this part of the conversation that is a red flag.

Budget tends to be the most sensitive subject. A lot of people are uncomfortable talking about this so I suggest using a general range. There are a ton of options for most remodels and budget is the deciding factor. Let the companies compete to provide the best package in that range. This will create a better apples to apples comparison of the bids. If a company is going to max out your budget with inferior materials, be happy to part ways before the real work begins. If you already have a stamped drawing, a design, all your materials selected and priced, then don’t worry about discussing a budget because you already have eliminated the variables.

Letting your potential contractor know the timeline you are looking for and any major events that this remodel could impact will alleviate unwanted stress. Trying to fit in a remodel when your family is scheduled to come into town the day after it is supposed to be completed is a sketchy proposition at best. Let them know what’s going on and they will tell you if it realistic. Throughout the conversation you will have a much better feel for the company’s personality and what they will bring to the table.

I’ve spoken with a lot of other remodeling companies and when they hear that I grab coffee with past clients or go out to dinner with them to discuss future projects, they are dumbfounded by that type of relationship. We make it our business to eliminate grey areas so before we start a project we know what our clients want and they know how we plan to deliver. I have found the best way for that to happen is to communicate openly because we trust one another, our work environment is set up to be in harmony with their living space, and we both have a true understanding of our goals and how we are going to accomplish them together.

Email me at [email protected] if there are any topics you would like me to cover in future articles or you have any questions about a remodeling project you are about to undertake. Your real estate is one of your best assets. Let the Property Pros help you get more informed.


Legacy Home Improvement banner

This is a sponsored column by Jim Muldoon, a Northern Virginia native, Arlington resident and one of the real estate and remodeling experts at Legacy Home Improvement Consultants. Legacy HIC is your source for all real estate and home improvement needs. Please email with any questions or topics you would like covered.

Selecting materials for your upcoming remodel can be a blast, but before you get too far into process get your remodeling company involved. There are more benefits than just a potential contractor discount.

Vendors and remodelers are on different sides of the construction industry, but they are both in the biz and they speak the same language. Coordinating materials is a job in itself and here’s why.

Making sure materials work well with each other is a must. The way your current plumbing is located might not work with that great furniture style cabinet you found, the commode might not allow enough clearance for code, the sink and faucet might not fit with chosen vanity top size. There are a ton of intricacies that go into the selection and installation of materials and you want a professional to ensure they will all work with each other.

Speaking of working with each other, vendor relationships are huge. Have you ever had the “in” at an exclusive restaurant because you were with a regular there? We are your “regulars” and yes, we have the “in”. Having a good relationship with vendors is about more than getting the special treatment. When remodelers have that established working relationship, vendors are more genuine with them when issues arise. Whether those issues are product defects or timeline delays, we can count on our trusted vendors to be honest and we can rely on them to make it right. Most importantly, we have familiarity with their products and they understand our company, our processes, and our expectations.

Another advantage is knowing the best people to work with at each vendor location. Nothing is better than working with someone who is great at their job and loves what they do for a living. Remodelers relentlessly seek out these individuals. It is music to my ears when my clients rave about my vendors. Top-notch vendors will enhance your experience and make sure no details are missed when putting your order together. My preferred vendors will call me to make sure the chosen materials fit the space, can be used for the particular application we are installing, and that the end product is exactly what the client envisioned.

Ultimately, the best thing about going through your remodeler to order materials is alleviating the stress of it all. Coordinating delivery dates, damaged goods contingency plans, vendor measurements, finish schedules; the list goes on and on. Professionals have the experience and know what to expect with each order allowing remodelers to maintain a smooth project. Having that direct line of communication between your vendor and your remodeling company allows a better opportunity for them to deliver quality goods and provide their services on time and hassle free.

If you are interested in receiving our Preferred Vendor’s List or have any other questions email me at [email protected] . If there are any topics you would like me to cover in upcoming articles please send them my way as well. Your real estate is one of your best assets. Let the Property Pros help you get more informed.


Legacy Home Improvement banner

This is a new sponsored column by Jim Muldoon, a Northern Virginia native, Arlington resident and one of the real estate and remodeling experts at Legacy Home Improvement Consultants. Legacy HIC is your source for all real estate and home improvement needs. Please email with any questions or topics you would like covered.

A project that gets a great bang for its buck is painting. Sounds boring, but there is a reason why every Realtor frequently makes that suggestion when getting your home ready to sell. Painting is very affordable and a freshly painted house is exactly that, fresh! It’s the equivalent to the new car smell, but for houses, and you can make dreary, dated rooms more welcoming.

A lot of people get stuck at stage one: deciding which paint, finish, and color.

The quality of paint is critical. Before you run over to Home Depot check out Potomac Paint or Sherwin Williams stores. The paint is a little more expensive, but it will cover well and ultimately look better. Your painter will appreciate it and should be able to extend a discount from either of those stores.

When it comes to finish, I would definitely consult your painter because a room’s function and lighting play a factor. High gloss and semi-gloss are more durable and absorb less moisture than other sheens, making them easier to clean.

Glossy sheens reflect light instead of absorbing it, so imperfections in drywall will stand out the most. You see this paint used on trim mostly for that reason and its durability.

Satin and eggshell are mediums that hide imperfections better and can handle some moisture. That makes these sheens more common in bathrooms and kitchens. Flat and matte cover great and hide imperfections well. The majority of ceilings and walls use this finish.

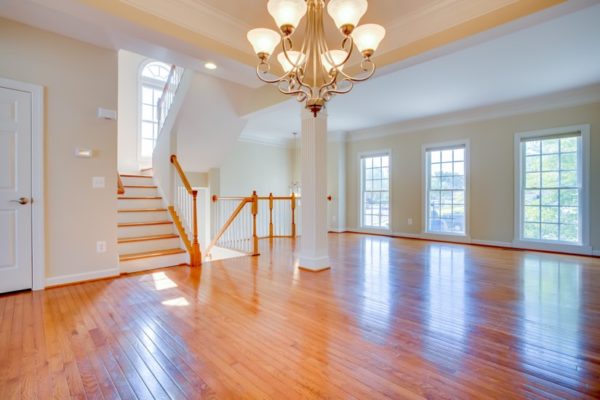
Finding a paint color can be overwhelming, so I suggest picking a shade that is trending. Grays and beiges on walls provide an amazing neutral look that won’t leave you feeling like you are at the doctor’s office. Ceilings and trim are still best painted white and I don’t see that changing any time soon. Keep in mind different paint companies use different names for the same colors, so make sure you get the paint code so your painter does not get confused. For example, Agreeable Gray is SW-7029 and Manchester Tan (below) is HC-81, which are two of my favorites. If you are pregnant, have an infant, or sensitive to smell, use Zero-VOC paint.

A Manchester Tan living room by Legacy Home Improvement Consultants

A good way to prep your rooms is to take pictures off the walls and move furniture into the middle of the room. Have your painters touch up the walls before the painting and caulk where necessary after. On average, houses cost $3,500-$5,000 and will take a week to finish.

If you have any questions about material selection or your renovations in general email me at [email protected] and I will get into more detail with you. Remember to shoot me questions that you would like for me to cover in future articles. Your real estate is one of your best assets. Let the Property Pros help you get more informed.

Be sure to follow us on Instagram @LegacyHomesDMV and like us on Facebook Legacy Home Improvements for project inspiration and breaking news.

View More Stories